

Hip Hinging
if you can’t Hip Hinge, you need to learn before you progress to fundamental exercises like Squats and Dead lifts. The good news is I’m going to show you hip hinge technique progressions which will help you strengthen the Gluteal Muscles and its associated structures, whilst helping you protect your lower back. For my Pilates Tribe this is an exercise you need to master. If you want to progress. And you do want to progress don’t you? Nod your head and say “yes Pierre”.
Stage 1 Modification: Grooving the Pattern
Neutral Spine
Readers of my previous blogs, on this site, will understand the term ‘Neutral Spine’ and how to get into it from a supine (back lying) position. In this video, I use the same Pelvic tilting technique to establish the halfway point between an Anterior and Posterior Pelvic Tilt. It’s easy, with practice, even if you’ve got the skill levels of a Giraffe on ice skates. It also helps to mobilise tight hips.
Hinging Technique
See (below) how I use the back of my hand on my neutral Lumbar Spine and the front of my other hand on my stomach, sorry, correction, ripped 6-pack, to give me feedback on maintaining a neutral Spine; whilst I hinge from the hips by sending by tailbone ‘down and back’. Imagine your pushing your tailbone, at a 45 degree angle, through a hole in a sheet of plywood. Remembering, of course: to keep the whole spine in neutral with your chest up; and to take your backside back out of the hole at the end of the movement. In case someone wants to park their bike.
To come up again is simple; reverse the process by imaging you’ve got a Walnut between the cheeks of your backside. You’re going to squeeze it to initiate the Gluteals and then, with a brisk but controlled movement, you’re going to straighten out the angle at your hips. Whilst squeezing your backside muscle (Gluteals) tightly at the top of the movement. Thus preventing you forming an excessive forward curve in your lower back. Remembering the hand at the back and front of the lower part of the trunk will give you feedback on keeping a Neutral Lumbar Spine.
Stage 2 Modification: Applying Technique under load
Once you’ve managed the basic hinging technique. You can then apply it under a light load. Note I’m now in the supine (back lying-see video below) thus loading my technique. I’m also holding a static bridge fully engaging the backside muscles (Gluteals). When practising this attempt ‘feel’ this contraction at the top of the movement. This is important before you commence the final phase of the exercise .
Stage 3 Attempting the Full Exercise
So let’s assume you’ve grooved your hinging pattern and can hold a strong, and I mean strong, static bridge at the top position. It’s time to test your ability to hold your pelvis and lower back in a neutral position without allowing the hips to: drop, rotate, move from side-to-side, or collapse into a heap on the floor. Watch how I lift my foot just about an inch of the floor and place it back down gently in the sequence: toe-ball (of the foot)-heel. Also, listen to my breathing pattern. This shows I’ve controlled the movement and not rushed, and demonstrates I’ve stabilised my lower back and pelvis successfully. Give it a go now!
Breathing
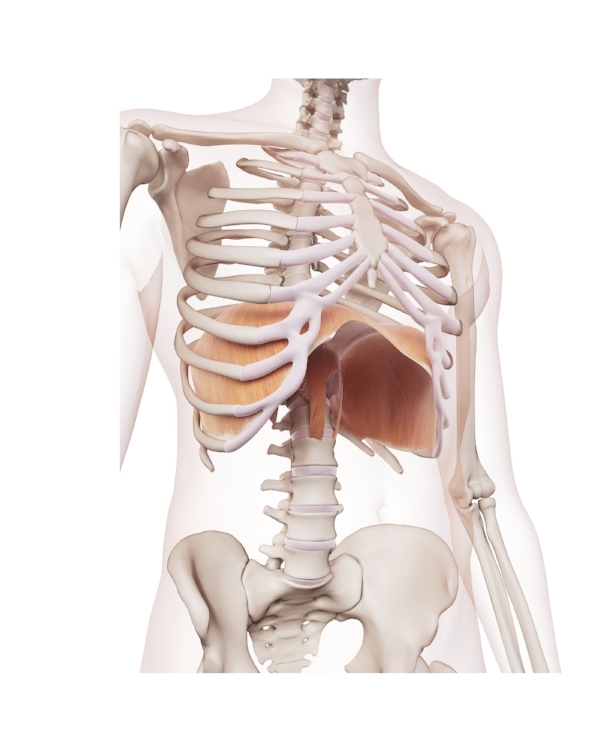
Yes lets! It is essential that you breathe 3-dimensionally opening up the back and sides of the rib cage. So the Diaphragm can do it’s funky stuff; namely help stabilise the Spine. Did you know that despite the diaphragm being the major muscle of respiration, 51% of it’s function is geared towards Lower Spine stability? Mention that little ‘factoid’ at your next dinner party and watch the metaphorical Sage Brush bounce across the room. You social hand grenade you.
Why do this Exercise?
People who have painful lower backs tend to have weak Gluteals (backside muscles) this tackles this problem specifically. It also helps to stabilise the Sacro-Iliac Joint (where the Pelvis joins the Spine) as well as strengthening the Thoracolumbar Fascia (a major player in lower back stability) at the base of your Spine. So if you have a lower back problem this exercise may well help. The usual rules apply of course, always get medical clearance before you commence any exercise regime, if you’ve any doubt whatsoever concerning safety.
Top Tips
- Take your time mastering the early progressions.
- listen carefully to the breathing patterns I employ for each progression.
- On the full exercise the breathing sequence is: Inhale to prepare From the back lying position; exhale to hip hinge and achieve the full bridge position; inhale to prepare to lift your chosen foot off the floor and exhale to lift; inhale to lower the foot (toe-ball of foot-heel) to the ground. Then exhale to lift the opposite foot: repeat the sequence for the opposite leg, as from the full bridge position.
- Lift the toes no more than an inch and slowly. Jerky movements or lifting too high indicates lack of control.
- Keep the Pelvis and Lower Back neutral, avoid Pelvic rotation, side to side movement or collapsing hips.
- When you’re supporting on one leg-whilst the opposite leg is lifting-imagine the kneecap of that leg is driving through the opposite wall and its associated backside muscles (Gluteals) are being squeezed into a flowerpot.
- Make the transition from one leg to the other smooth as possible.
- Breathe-don’t breath hold (see above).